Greetings, friend. Laundry is hard for everyone, perhaps because it is NEVER ENDING, so it goes on and on and on... But here are some thoughts for your consumption. These thoughts are geared towards someone who has a washing machine at home, though some would apply to everyone.
1) Perhaps your system is too big.
If you build it too big, it will be overwhelming. For more thoughts on systems and how to build them, visit the Lazy Genius Community.
2) Perhaps you could add a clothing hub.
Perhaps a family clothing "center" or "hub" would help? The idea would be to have one put-away spot for everyone in the household's clothes (instead of in their bedroom, which most people do by tradition). You get bonus points for easiness if you locate your "hub" near your washer and dryer.

For some ideas, you could Google "family closet" but that usually sends you to folks that have an entire room serving as a dedicated laundry hub, and many times the clothing is just divided by size, not user. If that floats your boat, great.
For me, I have all of my kids' clothes in one room (it happens to be their bedroom) and then I have my own clothing in my room and my partner's clothing downstairs. For you, maybe you have a guest bedroom that could serve double-duty? As a bonus benefit, this could also free up space in your actual sleeping bedrooms.
3) Consider relocating your washing machine.
If having a centralized laundry put-away spot doesn't make sense, maybe moving your washing machine closer to where you collect laundry might make sense? For example, maybe you could move it out of your basement and into your pantry or garage.

In my own house, moving the washer/dryer upstairs is impossible, plus since I'm usually working downstairs anyway, it's easy for me to remember to switch clothes from the washer to dryer, etc., because I can hear the beeps when the washer or dryer has completed its cycle.
4) Re-think your laundry transportation mechanism.
Carrying laundry down or up flights of stairs is not easy. If this applies to you, consider how you're transporting the laundry up and down the stairs. For us, we use baskets with smooth, durable handles, and sturdy sides. I don't want to deal with a basket that collapses in on itself.
We use this basket for dirty clothes, both as a hamper and as transport:

And we use this basket for carrying clean clothes to their final destinations:

I don't fold the clean laundry until I get to the items to their final destination(s). I just place the items directly into the carrying basket.
5) Drawers vs. hangers: do what's easiest for you.
Different people prefer to store clothes differently. Some people find hangers easier. Some find drawers easier. There is no "right" way - it's just what's easier and quicker for you. For me, I used to be a drawers person but as I get more and more "fun" work and church clothes, I'm morphing into a hangers person.
My point here is just to maximize the amount of put-away storage that is in your preferred style. Optimize your storage to suit the preferences of whomever is putting away the laundry.
6) Use products that work for you.
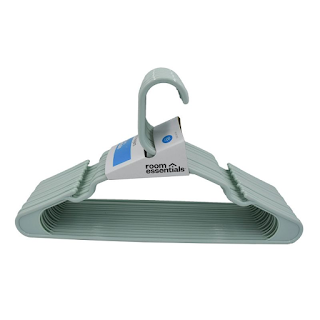
Don't be afraid to invest in whatever "hanger" or "drawer" system is best for you. For me, I have some Target plastic hangers that I particularly like for hanging things that tend to slip off of hangers. I like their smooth feel and that they don't take up a lot of space, so I got rid of all of my non-standard hangers and just use these, except for sweaters and jackets where I prefer beefier hangers like these.
I have a Container Store Elfa system that I love which works with the kooky size of my vintage home's built-in bedroom closet. I like Elfa because it lets you customize the percentage of drawers versus hangers storage. That being said, for closets with more typical dimensions, I love Rubbermaid, which offers a similar product at a fraction of the cost.

7) Gather "blank" (empty) hangers.
If possible, don't keep empty hangers mixed in with hanging clothes. I have a drawer for "extra" hangers, although keeping them on the closet rod but all bunched together in one zone of the closet is another option.
8) Re-think your folding routine.
If you fold all of your clothes, using baskets for some items (usually smaller items like socks) can save you time. I like the Curvier baskets from Container Store because they're durable - I use the "medium" and "large" sizes. You can place baskets inside the drawers of a dresser or on the shelves of a closet organizing system like the Rubbermaid system.

Another option is to place these items into "travel" mesh clothing bags, also called "packing cubes."

I keep my kids' t-shirts in travel bags all year round in their dresser because the bags keep the items somewhat compressed, which helps when space is at a premium. I find these travel bags particularly helpful for clothes that don't hold their shape well when folded, such as lightweight athletic clothing.

Yet another alternative for quick-stash clothing storage is storage cube furniture. I personally don't use these but I understand that some people find them very helpful for kids' clothing storage.
9) Have less inventory in your main space.
If you have less inventory, then the everyday clothing storage spaces will be less crowded, and you will be forced (gently persuaded) to do laundry more frequently. That being said, I have "offsite" and "backstock" locations for storing clothes I don't need regularly. I have my fancy clothes and winter jackets in a downstairs closet because I don't use them often.
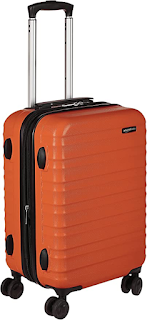
I have most of my out-of-season, one-size too big or small, and "extra" clothing in my suitcase - I find that suitcases make an excellent storage spot when they're not being used, and when they are in use, I have a large mesh bag to put all of that stuff while I'm away on travel. Everyone in my family has hard-sided carry-on size roller luggage - I find that having one size and hard sides makes them easier to stack and stow when not in use, as well as when we're traveling by car.
What I'm saying here is to consider having your go-to clothing in one main spot (this is the laundry that will make up 95% of your regular laundry loads) and then have other clothing some place else that is harder to access. Even though my winter and fancy clothes are located downstairs and I don't use them frequently, by mass/bulk/size, I have just as many of them as I have of my regular everyday clothes that I'm using 95% of the time! If I tried to fit all of that stuff in my main closet, it simply wouldn't.
It's the same with my kids' clothes - I have "extra" sweatshirts in their suitcases but given it's summer and that these warmer clothes are quite bulky, I only have about three fleece and/or sweatshirts in their everyday, easy-access clothing area (in the winter, I have about five per person in an easy-to-access location).
10) Have a regular folding and sorting area.
I always use my bed as my sorting center, but you could use a floor or a couch or a large table. I find it simpler on my brain if I have a large area to sort clothing (divide and conquer) and if I don't have to think about it each time - I've decided once where I'll be sorting and I just keep doing that on repeat.
11) Examine how you sort your laundry loads.
Find what works for you. For me, I have a "Just Me" load for only me (which is simpler for me because it doesn't get put away in the same area as everything else), a "Most" load (which is where the colors go), a "Towels and Jeans" load (because they take so much longer to dry in the dryer than normal clothes, and because every now and then the color on denim runs; I sometimes put sweatpants in this load too because they sometimes also take a while to dry), a "Partner/Whites" load (because I do this load infrequently and because my partner's clothes are more complicated to put away), and a "Reds" load (totally unnecessary but I find it fun to do a reds-only load).

I use mesh hampers to sort these loads for when they're not getting done right away. For me, this load-sorting methodology works. Other folks may choose to do "Heavy" (linens) and "Light" (delicates) sorting, or choose "Everything but Black" and "Black" sorting, etc.
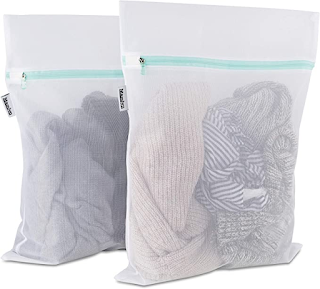
I also use mesh bags to separate clothing out that will not be going in the dryer.
In theory, having fewer loads would make laundry quicker, but after running a load through the dryer 3x because the towels weren't dry yet even though the rest of the load would've been dry but for the towels monopolizing the heat, I don't know if that's always true. Sort by person, by color, by type of fabric, or whatever works for you.
12) Rethink ironing.
Assuming you have some clothing that needs ironing, create a system that is easy to use. For us, that means a rod that hangs over our dryer where we hang clothing that needs to be ironed. Then we wait until a few items have accumulated before firing up our steamer.

And yes, we find a steamer to be a lot more fun to use than a traditional iron, plus you don't need a space-hogging ironing board. We have this one. Another alternative would be to never buy anything that requires ironing.

13) Designate a place for partially clean clothing.
The point here is just to create a system for used but still partially clean clothing. Some people use a chair and that's fine. Frankly, I re-fold and put clothing back in my drawer if it's almost 100% fresh, and hang it up if it is 1-2 uses away from needing a wash. Some people use hooks to stow partially clean clothing.

My partner just puts semi-clean clothing on top of his dresser. It doesn't matter what your system is; what matters is having a plan in place so that you don't wind up rewashing clothing that doesn't need it.
14) Consider running shorter duration loads.
I have been using the "Quick Wash" feature for pretty much everything ever since I heard the Laundry Love guy recommend it. Personally, I change the temperature of the water for my Quick Wash cycle to semi-warm instead of hot (note: hot is the default on my washing machine). I think 18 minutes per load is completely sufficient (note: the default on my washing machine is 12 minutes per load but I add a few more minutes since I've reduced the water temperature). The "Regular Wash" cycle on my washing machine takes almost an hour. That is a lot of time, not to mention the energy used to operate the machine for that long, nor how much frictional wear-and-tear the clothing receives being knocked into itself over and over again during all of that extra time.
For my washing machine, the "Quick Wash" cycle also runs the "Spin Dry" cycle on the High level. I thought my clothes wouldn't be able to handle that level, but they seem fine, and they take way less time to dry in my dryer when they've been spun vigorously. By using the faster Spin Dry cycle on my washing, my drying time in my dryer went down from two cycles in my dryer of 45 minutes each on the "Medium" heat level to one cycle in my dryer of 30 minutes on the "Low" heat level for most loads (towels and jeans take a bit more - I use one cycle in my dryer of 30 minutes on the "Medium" heat level for those rougher, more absorbant items).
15) Consider who can do the laundry.
Consider enlisting your children as helpers for either doing laundry or putting it away. My own mom harps on the fact that she was doing her own laundry at age 7. For me, I think I was doing it at age 10 by myself. To this day, my mom washes only her clothes and my dad washes his own. Given she's running the machine anyway, it seems to me like she could just dump my dad's clothes in there too, but who am I to say.
As for my own household, it's just easier if I do all of the laundry because my partner procrastinates and does inattentive things with the laundry (runs jeans with the zipper in the down position mixed with delicate clothing, does not check for full pockets before running loads, etc.).
16) Pay attention to pain points.
Even though I am putting this bullet point last, it is perhaps the most important. Start to finish in your laundry process, notice when you are making the "pain" face and really pay attention to that. You know: drawing your lips into a thin line with one corner bent downwards, or smirking, or audibly sighing, or narrowing your eyes - when your face is doing whatever it does when you're feeling let down. For example, maybe a dresser's drawers are too shallow and only a few things fit in there so the dresser is always half-open. Or, for example, maybe a dresser's drawers don't come out smoothly so you're always forcing it open/shut... Although there are many, many moments involved in the laundry cycle, I'll bet there are only a few true pain points that rise above the rest and make the laundry process dreaded.

For me, I noticed that one (former) pain point for me was that I had too many put-away categories. So now: all of my boys' fancy clothes are stored together (not by owner), and all of our swimwear is stored in one bench storage thing (instead of by owner with their regular clothes), and all of our towels are stored together (instead of separated out into kid and adult towels). Does this help me? Yes, it makes my put-away process simpler.
Right now, I'm encountering a different pain point, which is that I don't have enough hanging space in my closet. Long story short, I got more long cardigans and more work jackets and now I don't have enough space. I don't quite know how I'm going to solve this since reconfiguring my closet is not an option. Some ideas I have that may work for me: move the work jackets (except for my favorite two) downstairs, move the kids' sweatshirts someplace else (they are taking up the space that I used to use for hanging my jeans and skirts), pack up my less favorite clothes and move them into "backstock" in my suitcase, donate some more of my clothes, sell some of my clothes, move some non-clothing items (i.e. board games) out of my closet to free up space, or move my less favorite cardigans into "backstock" downstairs (with winter jackets).


